
PodLab Blog Posts
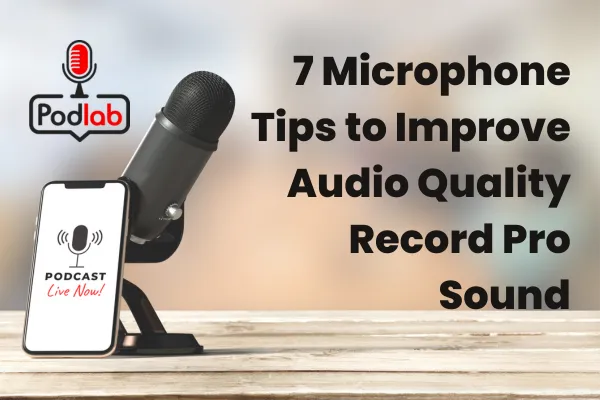
7 Tips for Professional Audio Quality on Any Microphone
In the world of podcasting and content creation, audio quality is paramount. You don't need to break the bank on expensive equipment, but you do need to sound professional. This post will guide you through 7 essential tips that can elevate your audio quality, regardless of your microphone. Let's dive in and discover how you can make your audio recordings sound top-notch.
Tip #1: Monitoring Yourself While Recording with Headphones
When it comes to achieving top-notch audio quality in your recordings, monitoring yourself is crucial. By listening to your voice in real-time, you can make immediate adjustments to ensure a professional sound. Using headphones for real-time feedback allows you to catch any issues as they arise, preventing unwanted surprises during the editing process.
One of the key aspects of monitoring yourself while recording is to avoid volume and gain issues. Maintaining a consistent volume level throughout your recording enhances the quality of your audio and makes the editing process smoother. By keeping an eye on the gain settings, you can prevent distortion and ensure a clean sound.
Monitoring your voice while recording is not just about technical aspects; it also helps you fine-tune your performance. You can adjust your tone, pacing, and emphasis by hearing yourself speak, resulting in a more engaging delivery. This self-awareness is invaluable for podcasting and any other audio-recording endeavours.
Remember, the key to a professional sound lies in the details. By paying attention to how you sound in real time, using headphones for feedback, and being mindful of volume and gain levels, you can significantly elevate your recordings' quality.
Tip #2: Proper Mic Placement
When it comes to achieving top-notch audio quality, mic placement is a critical factor that should not be overlooked. Proper mic placement can make a significant difference in the clarity and professionalism of your recordings. In this section, I will delve into key aspects of mic placement to help you enhance your audio production skills.
Optimal Distance for Microphone Placement
One of the fundamental principles of mic placement is finding the optimal distance between the microphone and your mouth. Maintaining the right distance is crucial for capturing clear and balanced sound without distortion or background noise interference. Experiment with different distances to determine the best sweet spot for your voice and recording environment. This will be different if you use a condenser microphone versus when you use a dynamic microphone, so you have to consider that.
Avoiding Hand Noises
Hand noises can detract from the professional quality of your recordings. Be mindful of any rustling or tapping sounds that may occur when handling the microphone. By avoiding hand noises, you can elevate the overall quality of your audio productions.
Tip #3: Using Stands or Arms
Benefits of Using Microphone Stands or Arms
One of the primary advantages of utilizing microphone stands or arms is their stability. By securely holding the microphone in place, stands and arms prevent unwanted noise caused by handling or movement. This stability is crucial for maintaining a consistent sound quality throughout your recording sessions.
Moreover, microphone stands or arms allow for hands-free operation, enabling you to focus solely on your performance without worrying about holding the microphone. This freedom of movement can enhance your delivery and overall recording experience.
Using Stands or Arms for Stability
Stability is key when it comes to recording audio. Using stands or arms to support your microphone ensures steady placement and helps eliminate unwanted noise caused by handling or movement. Investing in a quality microphone stand or arm can greatly improve your microphone's overall stability and positioning, allowing you to focus on delivering your content without distractions.
Ensuring Consistent Placement for Better Sound Quality
Consistent microphone placement is key to achieving optimal sound quality in recordings. By using a stand or arm, you can position the microphone at the ideal distance and angle from your mouth, ensuring clear and consistent audio capture.
Proper placement also helps minimise background noise and unwanted artefacts, resulting in a cleaner and more professional sound. Whether you are recording vocals, podcasts, or instruments, maintaining a steady and precise microphone placement is essential for high-quality audio production.
Options for Different Types of Stands or Arms
When selecting a microphone stand or arm, various options are available to suit different recording setups and preferences. Tripod stands are a popular choice for their stability and versatility, allowing you to adjust the height and angle of the microphone with ease.
Boom arms, on the other hand, offer greater flexibility in positioning the microphone exactly where you need it. These adjustable arms can be extended, retracted, and swivelled to achieve the perfect placement for your recording environment.
In addition to traditional stands and arms, desk-mounted options are ideal for compact setups or podcasting stations. These mounts securely attach to your desk or table, keeping the microphone within reach while maximizing space efficiency.
Ultimately, choosing between microphone stands or arms depends on your specific recording needs and workflow. Whether you prioritize stability, flexibility, or space-saving features, investing in the right stand or arm can elevate the quality of your audio recordings.
Tip #4: Speaking Direction
When it comes to achieving optimal audio quality, speaking into the correct part of the microphone is crucial. By understanding how to position yourself in relation to the mic, you can significantly enhance the clarity and professionalism of your recordings.
One of the key tips for minimizing unwanted plosives and mouth sounds is to maintain an appropriate distance from the microphone. Being too close can result in distracting pops and sibilant sounds while being too far can lead to a loss of warmth and intimacy in your voice. Finding the sweet spot where your voice is clear and natural is essential for a polished sound.
Remember, attention to detail in speaking direction and minimizing plosives are key factors in achieving top-notch audio quality.
Tip #5: Getting a Windscreen
One key accessory that often gets overlooked when it comes to enhancing audio quality and ensuring professional sound in recordings is the windscreen or pop filter. Let's see how using a windscreen helps reduce mouth sounds and wind noise and the considerations for choosing the right windscreen for your microphone.
Benefits of Using a Windscreen or Pop Filter
Using a windscreen or pop filter can make a significant difference in the clarity and quality of your recordings. These accessories are designed to minimize unwanted noises such as plosives, mouth sounds, and wind interference, resulting in cleaner audio output. By placing a windscreen over your microphone, you create a barrier that helps diffuse and absorb the impact of air currents and vocal bursts, ensuring a more consistent and pleasant listening experience for your audience. Whether you are recording vocals, podcasts, or voice-overs, a windscreen can be a valuable tool in your audio setup.
Reducing Mouth Sounds and Wind Noise
Mouth sounds and wind noise can be particularly distracting in recordings, affecting the overall professionalism and clarity of the audio. A windscreen acts as a shield against these unwanted sounds, acting as a buffer between your voice and the microphone.
By reducing the impact of plosives (popping sounds) and sibilance (harsh 's' sounds), a windscreen helps maintain a consistent sound level and tone throughout your recording. Additionally, when recording outdoors or in environments with ambient noise, a windscreen can mitigate the effects of wind interference, allowing for cleaner and more focused audio capture.
Choosing the Right Windscreen for Your Microphone
When selecting a windscreen for your microphone, it's essential to consider factors such as compatibility, material, and design. Different microphones may require specific windscreen sizes or shapes to fit snugly and effectively reduce unwanted noise.
Opt for windscreen materials that offer both durability and acoustic transparency to ensure minimal impact on sound quality. Foam windscreens are commonly used for handheld microphones, while fabric or mesh windscreens are preferred for studio condenser microphones.
Furthermore, consider the design of the windscreen in relation to your microphone setup. Some windscreens are designed for direct attachment to the microphone, while others may require a shock mount or additional accessories for proper installation.
Choosing the right windscreen that complements your microphone and recording environment allows you to optimize audio quality, reduce post-processing work, and deliver professional-grade recordings that captivate your audience.
Tip #6: Checking Gain or Volume Level
When it comes to achieving top-notch audio quality, understanding the difference between gain and volume is paramount. Gain refers to the sensitivity of your microphone's input, while volume controls the output level of the sound. Adjusting these settings correctly can significantly impact the clarity and richness of your recordings.
One key aspect to focus on is adjusting gain levels for optimal recording quality. Setting the gain too high can result in distorted audio, while too low of a gain may lead to a weak and unclear sound. Finding the right balance is crucial for capturing your voice with precision and depth.
For Mac and Windows systems, there are specific tips you can follow to fine-tune your gain settings. On Mac, you can access the System Preferences and navigate to the Sound settings to adjust the input volume. It's recommended to perform a sound check by recording a sample clip and adjusting the gain until the audio levels are consistent and distortion-free. Similarly, on Windows systems, you can adjust the microphone gain by right-clicking on the speaker icon in the taskbar, selecting 'Sounds,' and then navigating to the 'Recording' tab. From there, you can adjust the levels to ensure optimal recording quality.
Tip #7: Considering Your Recording Environment
Creating an optimized recording environment is essential for achieving top-notch audio quality for your podcast. Whether you're a podcaster, content creator, or voice-over artist, optimizing your recording space can make a significant difference in the clarity and professionalism of your sound.
There are a few key tips to keep in mind when it comes to sound treatment in different spaces. Firstly, consider the acoustics of the room you're recording in. Spaces with hard surfaces like walls, floors, and ceilings can cause sound to bounce around, leading to echo and reverberation. You can add soft furnishings such as rugs, curtains, or acoustic panels to absorb excess sound waves and create a more controlled audio environment to combat this.
Utilizing a walk-in closet for recording may seem unconventional, but it can actually be a game-changer for beginners wanting to improve sound quality. Walk-in closets are typically filled with clothes and other items that act as natural sound absorbers, reducing echoes and creating a more intimate recording space. Plus, the confined space helps to minimize external noise interference, allowing your microphone to capture cleaner audio.
There you have it - 7 tips to optimize your audio quality without breaking the bank! By implementing these tips and tricks for optimizing your recording environment, you can elevate the quality of your audio recordings and create a more professional sound experience for your audience.


Navigation
Contact Us
© 2023 All Rights Reserved
Podlab.agency